

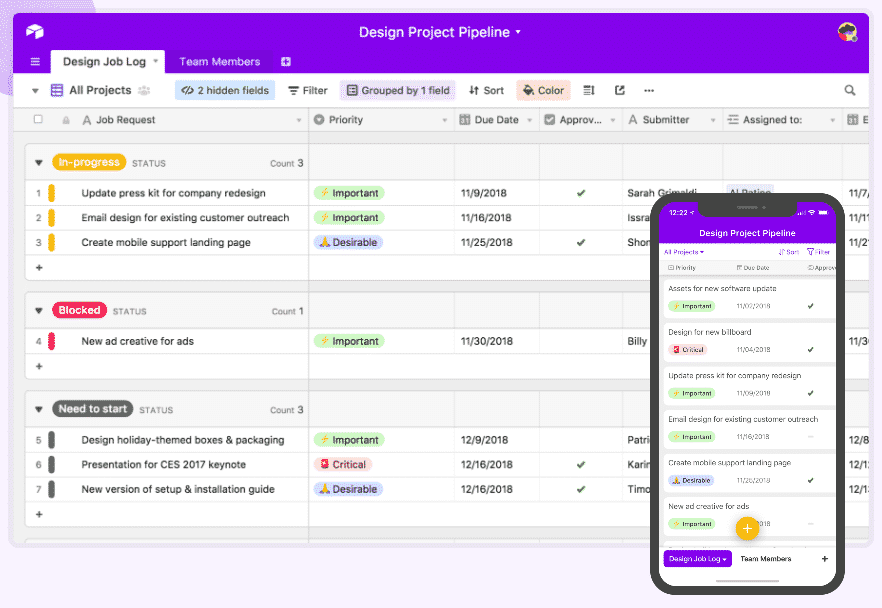
Airtable is a versatile online database that can be used for various purposes. In this blog post, we will discuss how to use Airtable as a database for your React application. We will use TypeScript and create a custom hook to get the data.
Create a new react app
We will create a new react app with TypeScript by using:
npx create-react-app Airtable --template typescript
If you need more information, you can read my article about how to quick start a react app boilerplate.
Installing the Airtable package
We need to install the Airtable package. We can do this by running the following command:
npm install airtable --save
And because we use TypeScript
npm install @types/airtable --save-dev
Our custom hook
Let’s build a custom hook instead of writing code for each data request in our app. This hook will accept the following parameters:
This hook will take some arguments to get datas and remain as generic as possible :
- Airtable api key
- Database ID
- Table name
- View
- Max records
It will process the request to the Airtable database and return a promise.
Step 1: define the types
In the /src folder, we will create a types folder.
In this folder we will create a file named TAirtableQueryResults.d.ts with the following type:
export type TAirtableQueryResults = {
  success: boolean;
  data: Airtable.Record<any>[];
  error: string;
};
This type will set the object structure that will be returned by the hook.
Step 2: get the IDs from Airtable and create the .env file
To get this hook working, you will need:
- your API Key that you can find here : https://airtable.com/account
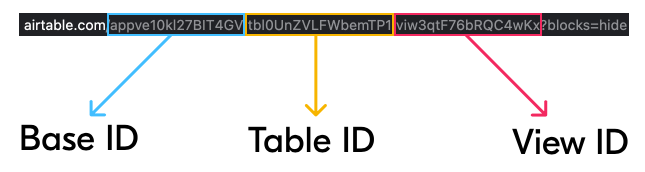
- your database ID that you can find in your browser URL, all the details available here: https://support.airtable.com/hc/en-us/articles/4405741487383-Understanding-Airtable-IDs
I would recommend to store these data in a .env file.
If you need any details to get this done in your react app, please read my article How to set up and use environment variables in your react app.
We will set 2 variables here with the following names:
REACT_APP_AIRTABLE_API_KEYREACT_APP_AIRTABLE_DATABASE
Step 3: create the hook useAirtable
This hook will import the type we declared above, set a default valus to some arguments, and check if the values exists before requesting the data.
import Airtable from 'airtable';
import { TAirtableQueryResults } from './types/TAirtableQueryResults';

export const useAirtable = (
  apiKey: string | undefined,
  baseId: string | undefined,
  tableName: string,
  view: string = 'Grid view',
  maxRecords: number = 100
): Promise<TAirtableQueryResults> => {
  if (
    !apiKey ||
    !baseId ||
    !tableName ||
    apiKey === '' ||
    baseId === '' ||
    tableName === ''
  ) {
    return new Promise((resolve, reject) =>
      resolve(returnError('missing parameters'))
    );
  }

  const output: any[] = [];
  const base = new Airtable({ apiKey }).base(baseId);
  const getData: Promise<TAirtableQueryResults> = new Promise(
    (resolve, reject) =>
      base(tableName)
        .select({ maxRecords, view })
        .eachPage(
          function page(records, fetchNextPage) {
            records.map((record) => output.push(record.fields));
            fetchNextPage();
          },
          function done(err) {
            if (err) {
              resolve(returnError(err));
            }
            resolve(returnSuccess(output));
          }
        )
  );

  return getData;
};

const returnSuccess = (data: any): TAirtableQueryResults => ({
  success: true,
  data,
  error: '',
});

const returnError = (error: any): TAirtableQueryResults => ({
  success: false,
  data: [],
  error,
});
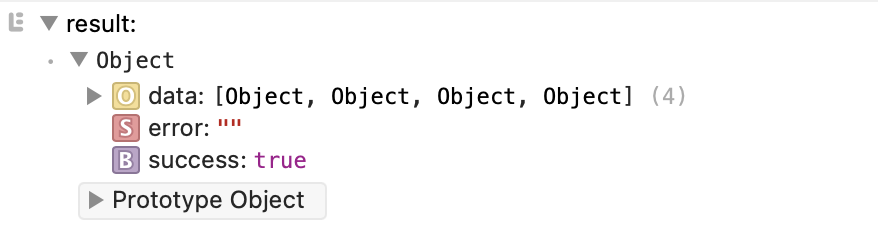
So, this hook will return a promise typed with TAirtableQueryResults.
We define two additional fuinctions for a successful return (returnSuccess) and an error return (returnError).
In all cases, this promise is always fulfilled with a success or an error to give in every scenario a result to the component.
Once the query is sent to Airtable, the results are stored in a table in preparation of the reply.
For the request, we will create a new base object with:
const base = new Airtable({ apiKey }).base(baseId);
Then we can execute the query by providing the table name and, if necessary, a view to use, as well as how many records to return. Because Airtable queries are paginated, we call the fetchNextPage() method to display all records pages and save them in an array.
base(tableName)
        .select({ maxRecords, view })
        .eachPage(
          function page(records, fetchNextPage) {
            records.map((record) => output.push(record.fields));
            fetchNextPage();
          },
          function done(err) {
            if (err) {
              resolve(returnError(err));
            }
            resolve(returnSuccess(output));
          }
You can get all the Airtable API details, and also the code to use in your queries by browsing to https://airtable.com/api.
Step 4: use the hook in your component
For this example, we will use the hook in the app.tsx file and display the result in the console.
import React from 'react';
import logo from './logo.svg';
import { useAirtable } from './useAirtable';
import { TAirtableQueryResults } from './types/TAirtableQueryResults';
import './App.css';

function App() {
  try {
    useAirtable(
      process.env.REACT_APP_AIRTABLE_API_KEY,
      process.env.REACT_APP_AIRTABLE_DATABASE,
      'contacts',
      'Grid view',
      10
    ).then((data: TAirtableQueryResults) => console.log('result: ', data));
  } catch (error) {}

  return (
    <div className="App">
      <header className="App-header">
        <img src={logo} className="App-logo" alt="logo" />
        <p>
          Edit <code>src/App.tsx</code> and save to reload.
        </p>
        <a
          className="App-link"
          href="https://reactjs.org"
          target="_blank"
          rel="noopener noreferrer">
          Learn React
        </a>
      </header>
    </div>
  );
}

export default App;
The hook is called in a try/catch block to handle fetch errors.
Once the promise is resolved, the result is visible in the console.
Step 5: run the app
Now it’s time to run the app with
npm start
🥳
Conclusion
Thank you for reading this article on how to use Airtable as a database for your React app. Airtable is a fantastic solution for quickly getting data into your React project, and with custom hooks, it’s simple to use it.
If you have any questions, please leave them in the comments below!
What can you do to help me?
Please don’t hesitate to:
- Like the article
- Follow me
- Leave a comment and express your opinion.
Happy coding !